INDUSTRIAL INSPECTION: Surface tester employs USB 3 cameras
Various methods are used for determining the hardness, Young's modulus or yield strength of surfaces and thin films. In indentation or impression testing, penetration depths in the nanometer range can be measured by pressing spherical diamond test objects into the sample to measure the indentation hardness and elasticity of the material.
In the design of its universal nano-mechanical tester (UNAT), for example, Asmec Advanced Surface Mechanics (Radeberg, Germany; www.asmec.de) employs two independent measuring heads for the measurement of normal and lateral load-displacement. The first nano-indenter operates in the normal direction and the second operates in the lateral direction to measure the compression and tensile strength of materials with nanometer resolution.
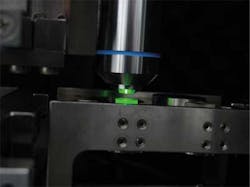
To measure these with nanometer resolution, sample material is first placed under an optical microscope of the tester. Illuminated with a green LED light, this sample is then imaged at magnifications of 500x and 2000x by two separate software-selectable cameras (see figure). Before testing can be performed, a suitable measurement position is defined in the microscope image after which the sample is moved using an x. y, z stage under the indenter. After indentation, the sample is moved back under the optical system.
To create an image of the sample, multiple images of the sample are taken at various focal distances. This is accomplished by incrementally moving the sample through a series of vertical positions using the z stage. After a series of images are taken, the sharply focused parts of each are extracted and re-assembled into one sharp image with a high depth of field.
Until recently, Asmec had used the CMOS USB 2 VGA series of cameras from IDS Imaging Development Systems (IDS; Obersulm, Germany; www.ids-imaging.com). Now, the company has decided to upgrade the system by employing IDS's USB 3 uEye 400Mbytes/s CMOS camera that features a 1280 x 1024 Mpixel EV76C560 CMOS imager from e2v (Chelmsford, Esssex, England; www.e2v.com).
"We use an auto-focus function in the UNAT to image an entire photo series and it is essential that the images are analyzed quickly. This requires a correspondingly high data transmission rate is important. With a data rate of 400 Mbytes/s, USB 3.0 offers considerable advantages," explains Frank Müller of Asmec. Use of the EV76C560 also allows larger image sections to be examined. As the test range is illuminated by a green LED, the high sensitivity of the sensor in the 500-600 nm range is useful for imaging poorly reflecting surfaces, such as glass or sapphire glass.
"Because the IDS software suite supports the company's complete range of cameras, no additional programming work was required to upgrade the system," concludes Müller.
Vision Systems Articles Archives

