Industrial Inspection: Line-scan-based vision system tackles color print inspection
To produce the many different types of printed materials required by their customers, printing companies employ various different methods to produce their products. These may include offset, gravure, laser and holographic printers and embossing and stamping machines. When printed sheets are produced, however, numerous defects may occur at different stages of the printing process. These could include ink spot marks, embossing defects and mis-registered colors.
To ensure that the complex color artwork produced by the printing and embossing processes meet the requirements of their customers, printing companies must ensure that each sheet is thoroughly inspected. Inspecting these sheets manually is slow, subject to human error and results in inconsistent inspection. By performing this task automatically, print quality inspection can be performed faster, more reliably and detect defects that may be imperceptible to the human eye.
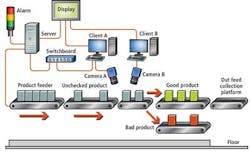
To perform this task, Beijing Daheng Image Vision (Beijing, China; www.daheng-image.com) has developed an automated machine vision system that inspects printed materials for such defects. In the design of the system, two PC-30-04K80 color line scan Camera Link cameras from Teledyne DALSA (Waterloo, Ontario, Canada; www.teledynedalsa.com) are used to capture images of the color prints as they move along a conveyor at 300m/min.
By capturing images from two different angles, defects such as ink spot marks, embossing defects and mis-registered colors can be determined. Data from these cameras are transferred over an interface to two separate Xcelera PX4 Dual frame grabbers, also from Teledyne DALSA, that are integrated into two separate PCs. According to Beijing Daheng Image Vision, two PCs were required to meet the throughput requirements of the system.
Before the machine can be used to inspect printed sheets, the system must first be trained by capturing known good printed sheets that meet the quality requirements. To accomplish this task, HALCON image processing software from MVTec Software (Munich, Germany; www.mvtec.com), is used to train a model of the variation of a reference sheet from a set of images of known good sheets. The model consists of a reference image and a variation image, and is used to determine permissible variation of any defects that may occur.
After this variation model has been computed, captured images are processed in a similar manner on each PC. Running HALCON, each PC executes image pre-processing, matching, alignment, compare, color segmentation and classification functions.
Results of these classifications are then transferred over a Gigabit Ethernet interface to a server. If the image processing system finds a defect, an I/O signal from the server is used to trigger a reject mechanism to remove the defective sheet from the conveyor. These defects can include blade scratches, embossing deviations, mis-registered printing and foil stamping omissions.
Vision Systems Articles Archives
About the Author

Andy Wilson
Founding Editor
Founding editor of Vision Systems Design. Industry authority and author of thousands of technical articles on image processing, machine vision, and computer science.
B.Sc., Warwick University
Tel: 603-891-9115
Fax: 603-891-9297


