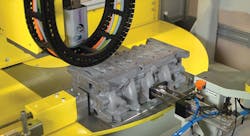
Automotive analysis: Conoscopic holography makes engine measurements more accurate
To ensure the high performance required by today's automotive engines, automotive manufacturers must ensure that engines are manufactured with close tolerances. This entails inspecting the engine block to make certain that machined features such as bore holes meet the correct specifications.
"In the past," says Dr. Xavier Savin, President of Groupe Visionic (Saint-Aubin-lè;s-Elbeuf, France; www.visionic.fr), "such tasks were accomplished using coordinate measurement machines that used mechanical probes to make such measurements." Although effective, such systems are less accurate that those that employ non-contact optical measurement techniques.
One such highly accurate optical method for performing such non-contact measurement is that of conoscopic holography, a technique that has been used by Groupe Visionic in the development of an automated machine to measure features of engine blocks such as the depth and width of bore holes.
After engine blocks are manufactured, they are robotically placed on a stage under two ConoPoint-3 laser distance sensors from Optimet (North Andover, MA, USA; www.optimet.com) that are mounted on an X-Y-Z gantry. To measure the geometric characteristics of the face of the engine the first laser scanner is used to make multiple distance measurements of known reference points on the engine block.
"Since the engine will not be placed in such a manner that all the bore holes will be perpendicular, data from the first laser scanner can be used to calculate its position in x-y-z space," says Savin. Once this is known, the scanner can be repositioned in x-y-z space to make an accurate measurement of the depth of each hole.
To measure the inside diameter of each of these holes, a second ConoPoint-3 laser distance sensor is fitted with a periscopic probe custom designed by Groupe Visionic. By fitting the laser sensor with the periscope probe, laser light from the sensor is then redirected at right angles from the periscope.
Using engine orientation data previously computed, this probe can then be placed at the correct angle within the bore hole. To make measurements of the diameter, the probe is then lowered into the hole at a depth of usually between 25-35mm and the ConoPoint-3 laser distance sensor fitted with the periscope automatically rotated. In this way, reflected laser light from the 360° circumference within the hole can be captured.
"Because the ConoPoint-3 laser distance sensors use the principle of conoscopic holography, an accuracy of between 20-50μm can be attained," says Savin. In the system developed by Groupe Visionic, the laser sensor is first positioned at a known distance of between 3-50mm from the part to be measured.
Monochromatic eye-safe laser light from the sensor is then focused onto the part to be measured using an objective lens. Reflected light from the part is then polarized into two orthogonal polarizations which then pass through a uniaxial crystal in the sensor. In such crystals, the refractive index of one crystal axis is different from the other such that light with one polarization will travels at a different speed than one that is polarized differently. Thus, the two rays that emerge from the crystal have distinct relative phase and cross-polarization angles.
By placing a second polarizer after the crystal, the direction of the electrical field of the rays is then recovered with the result that the phase delay between them will result in an interference pattern at the output. Because this pattern varies with the distance the laser scanner is from the object under test, signal processing algorithms can be used to retrieve the distance information from measured fringe pattern data.


