Vision system inspects automotive sub-assemblies
View Image Gallery>>
To reduce costs in vehicle production, automobile makers outsource the manufacture of complex subassemblies to Tier 1 suppliers. One such supplier builds fully assembled front and rear suspension corner modules for a large UK-based vehicle manufacturer. The component parts of the corner modules are assembled in a just-in-time process before being shipped to the vehicle manufacturer in the sequence that they were ordered.
The corner assembly modules comprise a number of component parts. These include the drive shaft, the wheel suspension system - including the wheel knuckles and hubs, dampers, springs and lateral and tension suspension arms - and the braking systems. To produce the complete modules, the components parts are assembled to form a complete unit as they sequentially move down a production line on pallets.
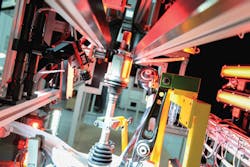
Once assembled, the corner assembly modules must be inspected to ensure that the correct components have been fitted to each one. To automate the process and relieve manual operators from the burden, engineers at Industrial Vision Systems (IVS; Oxford, UK; www.industrialvision.co.uk) have developed a vision system specifically for the task (Figure 1).
To do so, the multi-camera PC-based vision system is provided with the specifications of the components assembled into each specific corner unit from a Siemens PLC over a Profibus interface. Once the cameras have captured images of the items to be inspected on the corner unit, the images are transferred over a GigE Power over Ethernet interface though a hub to a PC which then uses IVS software to ensure that the correct variants have been fitted to the subassembly.
Compounding the inspection challenge is the fact that the corner unit of the automobile presented to the vision system may be designed for the front left, front right, back left or back right of a vehicle. As a consequence, the height and orientation of key components presented to the system can vary. The height of a drive shaft for a left hand corner unit, for example, will be presented to the vision inspection system at a different height to that of a right hand corner unit. Similarly, the lateral and tension suspension arms for a left hand unit face in different directions to those of a right hand unit.
In addition, the wheel unit of the corner assembly can be equipped with a number of different variants of brake caliper which can vary in size and color. The brake assemblies can also be fitted with different colored pad wear warning indicators and air scoops of different dimensions that are designed to keep the caliper cool. Hence the vision system must check that the right variants of parts have been fitted to each of the corner units for both the front and rear units.
View Image Gallery>>
Drive shafts
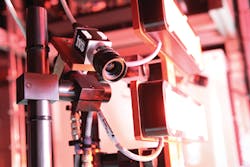
One important inspection task performed by the system is to check whether the correct size of drive shaft has been installed in each corner unit. To do so, an IVS monochrome 1296 x 966 pixel CCD camera captures a monochrome image of the shaft of the drive shaft which is backlit by a red LED (Figure 2). The image is then processed to determine the location of the edges of each side of the drive shaft from which its width can then be determined. The unique width can then be correlated with the model type of drive shaft fitted to the assembly (Figure 3).
In addition to checking that the correct drive shaft has been fitted to the assembly, the system must ensure that a retaining ring has been fitted to the end of the driveshaft. Due to the unique shape of the retaining ring and the unknown orientation of the part with respect to the drive shaft as it enters the inspection station, an image from a single camera would be insufficient to determine whether the retaining ring was present or not.
Hence, two IVS monochrome 1296 x 966 pixel CCD cameras were deployed to capture two images from two different perspectives of the regions surrounding the recession in the shaft into which the retaining ring has been fixed. By analyzing the contrast of the region surrounding the recessions in the backlit images, it is then possible to determine whether the retaining ring is present (Figure 4).
Because the left hand and right hand of the suspension corner module assemblies are fitted with drive shafts of two different lengths, the dual camera monochrome system backlit by a red LED was replicated at two different heights in the vision inspection station, so that the system can determine whether the retaining ring is present on different sizes of drive shafts.
Brake pads
Verifying the presence of the brake pads on the wheel assembly and that the correct version, size and color of the brake calipers have been fitted are other important inspection operations performed by the vision system. So too is determining whether the correct brake pad wear warning indicator has been fitted to the unit.
To detect the presence of the brake pads, two cameras were used, one on each side of the inspection station to accommodate both right and left hand wheel assemblies. While monochrome cameras alone would have sufficed to capture the important features of the brake pads, the system was fitted with color IVS 196 x 966 pixel CCD cameras to enable other color dependent features of the brake unit to be imaged.
The cameras are positioned such that they can not only capture an image of the brake pads, but also the brake disk and the brake pad warning indicator. To ascertain the presence of the brake pads, the brake unit is illuminated and the presence of the reflected light in the image can then be verified to provide a measure of whether a brake pad has been fitted.
To ensure that the correct size of brake disk has been fitted to the unit, images from the cameras used to image the brake pads are also analyzed by the IVS software to determine the width of the disk used in the unit. The system software also finds a region of interest around the image of the brake pad warning indicator captured by the same color cameras and from an analysis of the color of the indicator lead, the model of indicator can be verified (Figure 5).
View Image Gallery>>
Color calipers
The color camera used to determine the presence of the brake pad and the brake pad warning indicator is also used to detect the color of the caliper, providing an indication of the model of caliper used in the brake assembly. In addition, however, two other caliper parameters must be measured to determine whether a left of right hand caliper has been fitted to the unit and whether the size of the caliper is correct.
To do so, two IVS 1296 x 966 CCD color cameras capture images of the top of the calipers fitted to both the left hand and right hand assembly (Figure 6). By verifying the position of a key feature on the top of the caliper pad, the system software determines whether a right or a left handed caliper has been fitted to the unit. The size of the caliper is verified by calculating the distance between two bolts used to secure the two halves of the caliper assembly. The cameras also detect the presence or absence of a scoop used to force cool air into the brake assembly and from its shape, verify its type. In addition, the images are also processed to detect the presence, and to verify the type of the fastener used to fix the scoop to the caliper (Figure 7).
The wheel and tire assembly attach to the hub or spindle of a mechanical part known as a knuckle which allows the wheel to rotate while being held in place by the suspension assembly. In the automated vision system, it was important to determine whether a left or right handed knuckle was fixed to the hub. To do so, the color image previously processed by the system to determine the caliper size is again analyzed to determine the shape and hence the type of knuckle that has been fitted. A second image of the knuckle captured by a further 1296 x 966 CCD monochrome camera is analyzed to verify the position of a clevis hole on the knuckle from which the model of knuckle fitted to the unit can be determined.
Arm nuts
The penultimate inspection made on the corner unit determines whether the arm nuts at the end of the suspension units are present and have been tightened. To do so, two IVS 1296 x 966 monochrome CCD cameras lit by red LED line lights are mounted in the imaging station, enabling images of both the left hand and the right hand side of the suspension arms of the corner module assemblies to be captured. The system software then determines whether the outline of the contour of the nuts are present in the image, and measures the distance that the nuts protrude from the arm to determine whether they have been appropriately tightened (Figure 8).
Lastly, a further 1296 x 966 CCD monochrome camera is used to determine that the correct left or right handed lateral arm has been fixed to the unit by analyzing the shape of the arm as it is presented to the system. The image is also processed by the software to determine the presence of a bush that is used to attach the arm to the chassis of the vehicle has been fitted.
View Image Gallery>>
If the corner assembly passes all of the inspection procedures, the unit continues down the production line where it is readied for shipment to the automobile manufacturer. Should any unit fail any of the inspections, the results of the inspection are displayed to a user on a visual display unit attached to the vision inspection station. The corner unit can then be removed from the assembly line and the appropriate modifications made to the unit prior to shipment.
Since the vision inspection station has been installed at the Tier 1 supplier, it has replaced the need for the corner assembly modules to be inspected manually by skilled operators. In doing so, it has enabled the supplier to manufacture the modules more effectively, enabling it to build and inspect different variants of the corner modules in a just in time basis as they are required by the automobile manufacturer.
Earl Yardley, Director, Industrial Vision Systems (Oxford, UK; www.industrialvision.co.uk)
Companies mentioned
Industrial Vision Systems
Oxford, UK
www.industrialvision.co.uk
View Image Gallery>>
About the Author
Earl Yardley
Earl Yardley is the director at Industrial Vision Systems Ltd (Oxfordshire, UK), a global provider of non-contact vision systems, machine vision, and automated inspection machinery.


