Machine vision speeds nuts and bolts inspection
Good-quality fasteners are an essential part of any mechanical design. To produce them requires sorting and inspection systems that reject all defective parts and separate different types of fasteners. “Having encountered a variety of sorting problems from customers in many different markets, we have developed several machines to accommodate a range of inspection methods,” says Walter Hecht, technical director of Visicontrol (Weingarten, Germany; www.visicontrol.com). “By combining these methods in one machine, we can offer our customers more a flexible solutions.”
“To differentiate high-volume products such as fasteners,” says Hecht, “manufacturers must compete not only on price but also product quality.” To accomplish this, many types of fastener parameters must be checked automatically at high speed, including thread, outer diameter, root diameter, pitch and helix angle, shank diameter, length, groove width and position, and head height and diameter. “Often,” says Hecht, “these parts must be inspected at rates up to 1200 parts per minute.”
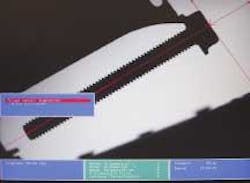
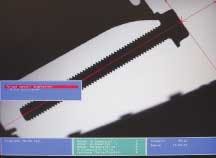
According to Hecht, parts to be inspected are fed from a vibratory bowl supplied by MBM-Maschinenbau Mainkling (Frankenhardt, Germany) onto a roller system, where parts with acceptable head sizes feed a vibratory rail. To maintain high sorting rates, the feed system can be flooded with parts and any overflow caught and routed into catch pans. As each part moves along the vibratory rail it is accelerated toward the vision inspection station where it is illuminated with an IR LED ringlight (see photo).
In its design of an automated fastener-inspection system, Visicontrol integrated a vibratory rail-based system that accelerates parts that are then inspected in flight by two RS-170 cameras. As each part is inspected, its thread, diameter, pitch, length, and head height are determined. Should a part fail inspection, it is blown into a bad-parts bin by a pneumatic system controlled by the machine-vision controller.
To ensure integrity, each fastener is inspected in controlled flight as it leaves the vibratory rail by two RS-170-based cameras. As each part passes a Keyence (Woodcliff Lake, NJ, USA; www.keyence.com) light sensor, two cameras are simultaneously triggered to image the part. While one camera is mounted to image the top of each fastener, the other is mounted at 90º, allowing a profile of the fastener to be captured in flight.
To perform analysis of both the images, the cameras are connected to a Visicontrol MVS-40 multiprocessor. This TI-C80-based machine-vision system features dual camera input, a proprietary light bus to control the power supply of the LED16 digital I/O lines, Ethernet, VGA output, and provision for incremental encoder control. To program the MVS-40 multiprocessor to inspect parameters including thread, diameter, pitch, length, and head height, Visicontrol engineers used the company’s proprietary visiTech programming language.
“visiTeach is both a measuring and control software package that allows developers to control a machine-vision and lighting system from a central point,” says Hecht. “With 30 measuring tools and gray-level image-processing functions, the software also allows communication and programmable logic control functions to be programmed from a central graphical user interface. Because the image-processing system can be linked to existing computer-aided quality systems, inspection reports can be generated to augment quality assurance.
According to Hecht, minimum tolerance is 1% of the dimension of the part being checked. To set the parameters of the system, a group of measurements can be programmed into the Visicontrol system. These can then be modified with either measurement windows or caliper points to suit specific drawing tolerances. After each image is inspected and a pass/fail decision is made, the machine-vision system actuates a pneumatic valve, which, in turn, triggers a pneumatic blow-off valve. Sorted parts are removed manually by the operator.
Although Visicontrol’s custom-built systems can range from $120,000 to $150,000, the company does offer both the MVS-40 and visiTeach programming language to large OEMs. “Because of the demand for such systems,” says Hecht, “our company has enlisted Global Automation (Old Saybrook, CT, USA; www.globalautomation.com) as its US representative for both OEM and custom-built inspection systems.”

