Vision automates PCA testing
Traditionally, making test measurements on finished printed-circuit assemblies (PCAs) required connecting appropriate test instrument to the test point and recording specific values. With the advent of surface-mount technology (SMT), however, interfacing to these test points has become more difficult because test points are smaller. “The possibility of probing the wrong test point and the risk of PCA damage due to accidental misprobing becomes a test of manual dexterity,” says Randy Schmidt, sales engineer at Huntron (Mill Creek, WA, USA; www.huntron.com). “Additionally, the time needed to manually test specific points on a PCA that uses SMT becomes a serious burden on engineering resources,” he says.
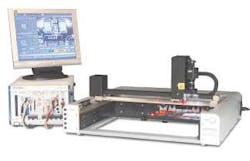
Huntron Access Automated Probing Station allows developers to automate test and measurement of populated PCBs. The system can be integrated with a number of PXI boards from NI to automate test and machine-vision functions.
To overcome these problems, Huntron has developed its Access Automated Probing Station, which automates the probing of test points on a PCA and results in greater system throughput. “Tasks that were previously accomplished manually can now be automated with 20-μm accuracy,” says Schmidt. “This ensures reliable and repeatable probing of densely populated PCAs and the smallest surface mounted components.”
Designed as a flexible automation platform, the Access platform can be programmed for a several applications, including guided probing, measurement, and automated optical inspection. “Because the system integrates visual inspection, electronics test, and motion control,” says Schmidt, “it was necessary to develop a user interface that allowed OEMs to customize the system to meet the demands of specific PCAs.” To accomplish this, engineers at Huntron used a top-down approach, based on LabVIEW from National Instruments (NI; Austin, TX, USA; www.ni.com). “Because this interface incorporates a visual display, test, and motion parameters, the end user can set specific test sequences from one display,” says Schmidt.
Access can be integrated with a number of PXI boards that are used to perform a variety of test functions. Under control of a PXI single board computer, specific functions are controlled by dedicated boards. The Huntron Access adds guided probe capabilities to test platforms such as the PXI 1149.1 boundary scan controllers from Goepel Electronic (Jena, Germany; www.goepel.com).
“One of the first goals during the design was to integrate machine-vision capability with a probe capable of moving in x, y, z,“ says Schmidt. The Access uses an NTSC-compatible analog color camera from Watec (Tsuruoka, Japan; www.watec.co.jp). To capture images from the color camera mounted on the x, y, z stage, the system uses a NIPXI-1411 frame grabber. Images captured from the camera are then transferred to the host computer for image analysis using NI IMAQ Vision software. Images captured from the camera can be used to select test locations on the board. Over the RS-232 interface of the host PXI-based CPU, serial commands are sent to the motion controller to move the x, y, z stage. In this way, both machine vision and probe positioning are seamlessly integrated into a single system.
To make measurements such as voltage, current, and frequency, a bed-of-nails pogo pin is mounted on the x, y, z stage. Connected to both a NI 4060 digital multimeter and an NI 5102 20MSample/s digitizer, signals from the test pin can be analyzed in many ways. “Using the NI 4060, voltage, current, and resistance measurements can be performed,” says Schmidt. “With the NI 5102 digitizers and NI’s Scope-compliant instrument driver, time and voltage histograms and frequency measurements can be performed on the signals,” he says.
Sample application
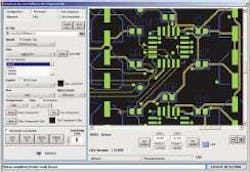
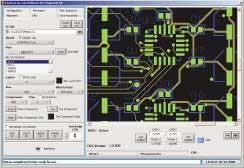
The Access Automated Probing Station software development kit (SDK) provides a sample application developed in NI’s LabVIEW programming environment. The sample application allows PCB CAD information to move the probe and camera to any location on the board. The CAD view can also be panned to match the location of the Access probe/camera. For creating PCI- or PXI-based custom test sequences, the SDK links the embedded CAD toolkit to the Access system to drive to points of interest automatically.
The CAD Toolkit, which is available separately from Huntron, is based on CAD tools from Router Solutions (Newport Beach, CA, USA; www.rsi-inc.com). This SDK, developed in LabVIEW, includes Express VIs, IMAQ Vision for autoalignment, control of NI PXI DMM, scope and switch cards, display board layout information, and provides part and test point locations.


