Digital System Exploits X-ray Imaging for Pipeline Analysis
Several European companies have jointly developed a solid-state, digital, high-speed x-radio-scopic system for the quantitative analysis of industrial pipelines.
Providing straightforward imaging procedures and image interpretation, conventional radiographic-film x-ray imaging systems are being used in refineries, oil terminals, and oil-storage facilities to measure pipe blockages or layering, pipe thickness, and internal and external corrosion.
However, because these x-ray inspection systems use film to generate images, the process is generally slow, expensive, radiation-hazardous, and time-consuming.
To overcome these limitations, a solid-state, digital high-speed x-ray system, known as Raysquins, has been developed jointly by several European companies, including Thomson Tubes Electroniques (Meudon-La-Foret, France), Photonic Science Ltd. (Robertsbridge, East Sussex, England), the Materials Research Department at the Risø National Laboratory (Roskilde, Denmark), and the Carl Bro Group (Glostrup, Denmark). Says Joergen Rheinländer, senior scientist at the Risø National Laboratory, "Our overall aim has been the development of a portable, remote-controlled, real-time radioscopy system for quantitative industrial inspection of thick steel pipes and welding. The approach we have taken has many advantages over existing 300- to 700-keV radioscopic imaging systems, including shorter exposure time, three-dimensional quantification of detected defects, remote control, conventional computing platform, reduced radiation risk, and improved image quality—all at lower cost."
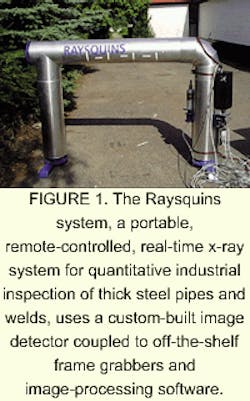
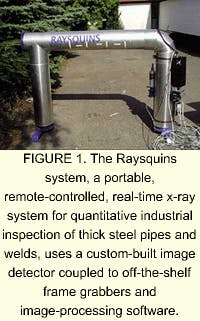
Thanks to the integration of various hardware and software components, adds Rheinländer, "the system also implements modules for characterizing defects quantitatively, digital image acquisition and processing, algorithms for stereoscopy and tomography, and special radiation shutters." Consisting of a high-energy x-ray source and detector mounted on a robotic unit, the Raysquins unit is mounted on a pipe using straps and can scan up to about 1 m of pipe before being moved to another location. It has been evaluated on-site at Statoil Refineries (Oslo, Norway) for inspecting pipe bends and T-junctions (see Fig. 1).
Sources and detectors
To generate the required voltages for pipe imaging, the system uses a 2-MeV Betatron pulsed x-ray source based on a small synchrotron to stream electron pulses onto a tungsten target. After imaging the pipe, the resulting x-rays are digitized using an 88-mm proximity-focused x-ray image intensifier that is optically coupled to a 1024 x 1024-pixel, 12-bit CCD developed by Thomson.
"A critical concern for successful high-energy radioscopy is the absorption of radiation in the entrance to the scintillation screen," says Rheinländer. "The better the absorption, the greater the number of electrons emitted in the scintillator and the better the contrast. Achieving the required absorption at high radiation levels involved choosing a scintillation material with a high effective atomic number, such as cesium iodide (CsI), and growing a relatively thick layer of this scintillation material on the detector," adds Rheinländer.
Initially, 2- and 4-mm-thick screens of CsI were manufactured by Thomson. However, screen prototypes revealed a limiting resolution of around 1.8 lp/mm (about 280 µm) for the 2-mm screens and 0.6 lp/mm (0.8 mm) for the 4-mm screens. In the final Raysquins system, the 2-mm screen is used.
The proximity-focused x-ray image intensifier consists of a 0.1-mm-thick stainless-steel input window, a 2-mm-thick CsI screen, a high-efficiency output screen with a black layer to avoid contrast loss, and a dark, antireflection-coated output glass. This intensifier is integrated with the CCD camera, which delivers a 10-MHz readout rate, as well as optics and a mirror packaged in a radiation-resistant tubular housing. The complete detector unit measures 393 mm in length and 130 mm in height and width
To digitize images from the image intensifier, the original detector directly coupled the scintillator to the CCD using radiation-resistant fiberoptics. However, this direct-coupling method significantly shortened the lifetime of the CCD and produced a poor signal-to-noise ratio. Because of this, Photonic Science chose to develop an image sensor using a 1k x 1k-resolution, full-frame CCD that is lens-coupled (f1/2) to the Thomson x-ray image intensifier.
"The solution required a thin, compact camera because the camera had to be carried on the pipe-crawler robot and maneuvered behind pipe runs and into tight corners," says Patricia Tomkins, Photonic Science managing director. "Until now, commonly used x-ray image intensifiers have been electrostatically focused, and so they suffered from image deflection due to changing electromagnetic fields. In a refinery environment, changing background magnetic fields would cause distortion and prevent image processing," she adds.
To digitize video signals from the CCD, Photonic Science uses a PC-based system with a PCI-based Pulsar frame grabber from Matrox Electronics (Dorval, Quebec, Canada). It also developed camera drivers that run under Image Pro Plus image-capture and processing software from Media Cybernetics (Silver Spring, MD). The gain, integration period, and binning of captured images are controlled via a custom dialog box. In binning mode, the pixel size is increased to attain improved sensitivity. Increasing the image integration period allows for longer exposures, which enhance the system signal-to-noise ratio.
"Because of possible radiation effects," says Tomkins, "up to 21 meters of cable can be used to link camera and computer, allowing the operator to be at a long distance from the radiographic process.
This improves safety and minimizes radiation hazards."
Inspection software
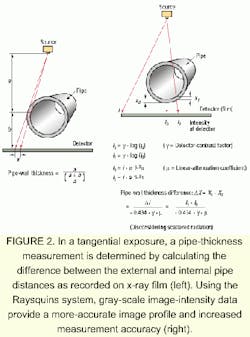
Key to inspection of pipelines is the measurement of the pipe-wall thickness. A simple approach determines wall thickness via a tangential imaging technique in which imaging algorithms locate the outer and inner edges of the pipe wall in a profile (see Fig. 2). However, the Raysquins approach developed by Rheinländer uses an image's gray-scale levels, which are affected by the attenuation of radiation through a sample.
Expected attenuation for a particular sample can be calculated based on the radiation source, the nominal thickness of the pipe wall, the medium flowing in the pipe, and the location of the area considered relative to the pipe's central axis. Comparing the gray-scale levels of an image with the theoretical calculated values results in a pipe-thickness deviation value with an accuracy of 4%. "This technique also works well in cases where there are internal and external deposits on the pipe," says Rheinländer.
"Preliminary results indicate an inaccuracy of about 10% when the filling level in the pipe is known," Rheinländer adds. "Because this is not always the case, evaluation of profiles through pipes with different media inside and different filling levels are currently being tested using neural-network approaches at the Risø National Laboratory and at the Portuguese Quality and Welding Institute (Oeiras, Portugal)," he comments.
Other software techniques under development include a tomographic reconstruction algorithm based on a limited number of projections and an algorithm for stereoscopic reconstruction, designed for evaluating weld seams. The former has resulted in a multistep reconstruction procedure using seven projections that can achieve results rivaling those obtained by conventional tomography that use 10 times as many projections.
Practical pipeline applications of the Raysquins system are now underway. Preliminary results show that for inspections of large pipes, spatial resolutions are on the order of 0.2 mm with a contrast of better than 1.5%.
Company Information
Carl Bro Group
2600 Glostrup, Denmark
Web: www.carlbro.dk
Matrox Imaging
Dorval, QC H9P 2T4, Canada
Web: www.matrox.com/imaging
Media Cybernetics
Silver Spring, MD 20910
Web: www.mediacy.com
Photonic Science Ltd.
Robertsbridge, East Sussex,
TN32 5LA England
Web: www.photonic-science.ltd.uk
Portuguese Quality and Welding Institute
Oeiras, Portugal
Web: www.isq.pt/ingles/Isq.htm
Risø National Laboratory
DK-4000 Roskilde, Denmark
Web: www.risoe.dk
Statoil
Oslo, Norway
Web: www.statoil.no
Thomson Tubes Electroniques
F-92366 Meudon-La-Foret, France
Web: www.tte.thomson-csf.com


