3D Imaging Helps Locate Dangerous Defects in Train Rails
KONSTANZ, GERMANY—Researchers from Northeastern University in Shenyang, China, have engineered an unsupervised stereoscopic saliency detection system1 for locating defects in railroad rails using the Chromasens 3DPIXA Pro Dual line scan camera.
Rail surfaces are subjected to severe stresses from heavy freight traffic, high-speed long-haul trains, and the constant braking and acceleration of rail cars in light rail traffic. In addition to natural wear, these stresses become evident in the form of various rail defects including squats, spalling, and flaking. Newly manufactured rails also require inspection before being put into service.
Detection of rail defects by imaging systems is a challenging task because of intensity inhomogeneity, low contrast, and noise. Two of the most commonly applied methods of railway defect detection are 3D profile reconstruction and the use of structured light and line-scanning stereo matching to obtain 3D information. Both face the problem of encoding and decoding structured light fringes, and their reconstruction accuracy depends on resolution. Imaging information is susceptible to the illumination and shooting angles. Also, in the profile detection, some local distortion or loss of depth information will lead to false detection.
Related
- 3D Imaging’s Scope Continues to Expand
- Fast semiconductor inspection with high-resolution color line scan cameras
- Recent advancements expand the scope of 3D imaging for machine vision
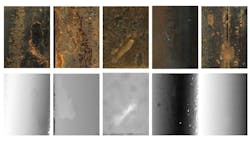
To overcome these problems, the researchers at Northeastern University devised a stereoscopic visual system capable of acquiring 2D images and 3D profiles of rail surfaces at a high speed and high resolution by using the Chromasens 3DPIXA camera coupled with a Chromasens Corona II line scan light, along with depth outlier detection and a GLRNNR (Global Low Rank and Non-Negative Reconstruction saliency algorithm. Thanks to the 3DPIXA's design, researchers were able to preclude the nonuniform between 2D and 3D information acquisition during the inspection process and gain more effective information in the detection of surface defects. A disparity map of the camera's left and right sensors was obtained by stereo matching. A corresponding depth map was then calculated based on the disparity map by combining the internal and external parameters of the sensors. To accelerate this calculation, a simple, fast stereo semiglobal matching algorithm was applied so that highly precise depth information could be achieved with a resolution of 14 μm in a range of 52 mm.
Optical resolution of the Chromasens 3DPIXA Pro Dual model deployed by the researchers can reach 70 μm/pixel, with an acquisition speed up to 1.4 ms and a maximum frame rate of 21 kHz. One of several models in the 3DPIXA family, this camera features 7142 pixels and an RGB three-channel sensor.
Experimental results showed the novel system using the Chromasens line scan camera outperformed fifteen of the most state-of-the-art methods for rail surface inspection available today, based on a standard dataset. To verify the system's applicability on gray images, a different dataset was tested to compare the novel system against other known visual inspection methods with similar results. Researchers plan to develop and enhance the existing system to better detect shallow internal defects and defect attributes.
For more information, visit www.chromasens.com.
1. M. Niu, K. Song, L. Huang, Q. Wang, Y. Yan and Q. Meng, "Unsupervised Saliency Detection of Rail Surface Defects Using Stereoscopic Images," in IEEE Transactions on Industrial Informatics, vol. 17, no. 3, pp. 2271-2281, March 2021, doi: 10.1109/TII.2020.3004397.
