Industrial Automation : Shape from shading images steering components
High precision metal-plastic composite assemblies are used in many automotive applications such as steering controls. These hybrid assemblies with their plastic parts, metal conductor lines and bonded surfaces form an integral part of the steering for modern vehicles and provide the safe transfer of driver's commands to the reaction of the vehicle. Since such parts perform extremely important functions, all the components of such a functional assembly must be tested before they are shipped to the customer. After manufacturing such parts, Swoboda (Wiggensbach, Germany;www.swoboda.de), a manufacturer of metal-plastic components for automobile electronics required a system to inspect these parts for any possible defects..
One of the main challenges faced with developing such a system was the optical variances encountered when imaging the metal-plastic parts. Using a conventional 2D machine vision system, the different differing light reflections from each part led to increased false rejects that required further manual analysis and resulted in additional manufacturing costs. To overcome this, Swoboda installed a Trevista system from Stemmer Imaging (Puchhein, Germany;www.stemmer-imaging.de) to detect and analyze the surface of the parts at high resolution. Using the system, false rejects were reduced by nearly two thirds.
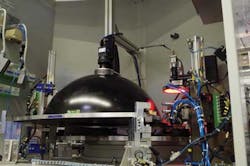
To detect and analyze the surface of the parts, the Trevista system uses a technique known as shape-from-shading. In this technique, the surface normals of light reflected from objects are imaged under different lighting conditions. To accomplish this, the assemblies were placed under a dome light that was used to illuminate each part with diffuse light from four different directions. Within the dome light there are two LEDs located in four separate segments. These segments are illuminated sequentially using a flash controller and a timing unit. A Genie TS 4096, 12Mpixel camera from Teledyne DALSA (Waterloo, Ontario, Canada;www.teledynedalsa.com) placed above the dome light then capturesfour different images of the part.
A proprietary algorithm then processes these input images and creates four synthetic images. While the first two represent the local slope of the surface in x and y directions, the third, the so-called curvature image represents the topography of the surface. Finally the fourth image records the texture of the surface and can be compared to a conventional 2D image.
All four images are captured and transferred to a host PC for analysis of faults using the Common Vision Blox software from Stemmer Imaging. To determine whether any part is faulty, an algorithm written using Sherlock software from Teledyne DALSA operates on each of the images individually. In the simplest case, a blob analysis with a threshold is performed on the gray scale values of the image to determine the local slope. In this way, even small fault characteristics of only a few micrometers in depth can be determined. The curvature images show the surface's shape characteristics, and are not affected by the brightness and color of the part. Area scan cameras are used in the Trevista system for inspecting non-moving assemblies. However, in case of inspecting the outer cylindrical surfaces of rotationally symmetric components, a combination of the Trevista technique with line scan cameras are used.
Vision Systems Articles Archives

