Off-the shelf hardware inspects fuses
By Andrew Wilson, Editor, [email protected]
Low-cost electrical consumer products such as household fuses are often manufactured at extremely high rates. Despite their low cost, the high-volume production of these components does not lend itself to batch testing, since even a small percentage of faulty products can result in electrical circuit failure, or, worse, the recall of large batches of products. For one German manufacturer producing components at rates up to 10,000 per hour, 100% inspection was required to maintain high quality standards. SVS-Vistek (Seefeld, Germany; www.svs-vistek.com) was called upon to retrofit machine vision to a fully automated inspection system developed by Nohau Industrie Elektronik Produktionssysteme (Regensburg, Germany; www.nohau-gmbh.de).
“In the design of consumer fuses,” says Walter Denk, general manager of SVS-Vistek, “a metal wire is held in place within a glass cartridge casing by two metallic caps. If two much current flows within the circuit, this metal wire melts, breaking the fusible link and thus the circuit.”
Stamping the electrical power rating on the side of each cap allows the consumer to understand the voltage and amperage rating even when the fuse is removed from its final packaging. “Since this is a very important feature of each fuse, any machine-vision system must clearly interpret and classify these markings,” says Denk. To attach the metal wire in place between the glass caps in the glass cartridge, two solder joints are used at the end of each cap.
“Sometimes,” says Denk, “during manufacturing these solder joints run out from the end of each cap. In such cases the joints could fall off prematurely, rendering the fuse useless.” Thus, it is vital to inspect for both the presence of the metal wire and whether any solder leaks have occurred.
In developing the fuse-inspection system, SVS-Vistek faced a number of challenges. “Since the manufacturer had already deployed a system to manufacture fuses, it was necessary to retrofit machine vision to this system. In this system, finished fuses are finally held horizontal in a spring-based clamp at the rate of approximately three fuses every second. “Thus,” says Denk, “it was necessary to inspect each fuse for the integrity of the optical characters on the casing and the electrical contacts between each cap at the rate of approximately three pieces per second.”
One of the most important considerations was the proper choice of illumination. Because the metallic caps of the fuses reflect light, a DF-150-3 Series darkfield illuminator from Siemens Energy and Automation (Nashua, NH, USA; www.nerlite.com) was used. “Incorporating three tiers of LEDs mounted at 75º to the optical axis provided effective low-angle lighting to targeted regions, capitalizing on oblique illumination to enhance contrast in the metallic cap of the fuse,” says Denk.
Because fuse characteristics were stamped around one end of the metallic cap, it was necessary to capture the full field of view of the 20-mm fuse. To reduce the cost of the system, this was done by placing four STC 1100B CCD 659 × 494 monochrome cameras from Sentech America (Carrollton, TX, USA; www.sentechamerica.com) at 90º around the part. “By equipping each of the four cameras with a 70-mm lens from Schneider Optics (Hauppauge, NY, USA; www.schneideroptics.com) placed approximately 100 mm from the part,” says Denk, “the machine-vision system could visualize the complete area of the fuse.”
A PC-based system equipped with two Domino Alpha 2 PCI-based frame grabbers from Euresys (Angleur, Belgium; www.euresys.com) captures images from all four cameras. “Since the Domino Alpha 2 features two camera connectors, it can acquire images simultaneously from two nonstandard progressive-scan monochrome analog cameras,” says Denk. Captured images are transferred to the host PC memory for processing.
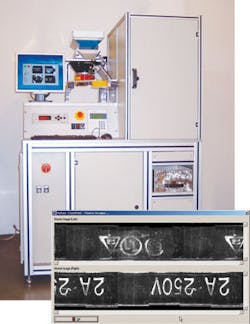
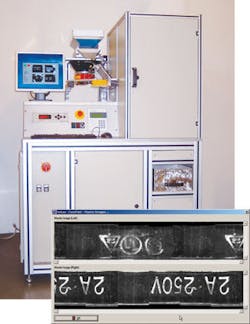
Since all four images are transferred simultaneously to the host PC memory, the complete 360º image of the fuse must first be unwrapped (see figure). “Although eVision software from Euresys was used to transfer images to the host,” says Denk, “a custom unwarping algorithm was developed as a callable routine from within eVision to compute the symbols located at the top of each fuse.”
Since the codes used on each of the fuses is well known, a set of templates could be developed for each specific fuse type. Once developed, Euresys’ EasyMatch and EasyFind normalized correlation and gray-scale matching libraries were used to check the integrity of each of the marked fuses.
While inspecting the character markings of each fuse, the reliability of both solder joints within the fuse needed to be determined. “Because of the size of the solder balls,” says Denk, “it was necessary to add extra illumination in the form of small ringlights mounted at the front of each lens to increase the contrast of the captured image. As well, reflections from the caps of the fuses were removed by illuminating the object with polarized light. This was done by placing a polarizing filter over the camera lens.
Once properly imaged, each of the solder balls was characterized using Euresys’ EasyObject library. Using blob analysis, this software provides information about distinct objects that are present in an image. After connected component labeling isolates and identifies the objects, geometric features such as the area of the solder ball are computed and their characteristics measured.
After each fuse inspected and the results determined, the PC instructs a PLC to pass or fail each component. Should a component fail, the spring mechanism holding the fuse is actuated and the component is rejected form the machine. Known good parts are transferred to a packaging and production line for shipping to customers.

