MoviTherm Develops Inspection System for Infrared Welding Applications
MoviTherm has developed a thermal imaging inspection system for use in infrared welding applications.
Infrared welding is a method of joining objects using infrared radiation to produce and focus intense heat to melt designated surfaces on the objects in order to join or fuse them without negatively affecting their structural strength. This is done by placing the objects to be joined in a welding fixture, a tool used to hold, position, and locate objects to be joined together, then positioning the sources of the infrared heat, called emitters, so that they can be concentrated at an optimum point between the two objects to be joined. The emitters, configured and installed on a device called a platen, are then positioned between the objects to be joined and brought to the optimum temperature for the weld.
Infrared emitters are essentially bulbs made from quartz glass. They produce and concentrate the heat energy needed to perform a weld. An emitter can produce heat energy between 3,300° and 4,400° F, and those operating temperatures can be reached within one second. Once the designated areas on the objects that are being joined are melted, a process that takes a few seconds, the objects are then mechanically pressed together to form the weld.
Infrared welding, especially useful in joining thermoplastic materials, has several important advantages over other welding/fastening methods. It requires less energy, therefore lower energy costs; it is a non-contact, particle free process; it produces a hermetic seal; it can be performed on a variety of materials; and there is no restriction on contour parting lines.
Challenges with Infrared Welding
Infrared welding while very useful, effective, and energy-efficient, has its share of challenges, says David Bursell, vice president of business development for MoviTherm (Irvine, CA, USA) For one, infrared welding is not as effective on reflective materials, even materials that do not appear to the naked eye to be reflective.
Maintaining the optimum heat levels for a strong weld is an important part of the process. If an emitter starts to lose power, for example, the weld may have a “cold spot” which will weaken it.
Another challenge is maintaining uniformity of materials. This turned out to be an unexpected but very important discovery, Bursell said. One of MoviTherm’s customers had a production run that experienced a dramatic reduction in weld quality — a situation the inspection alerted them to, in fact. After tracing the process from finished weld to raw material, it was found that the raw materials being used in that production run had been stored in different locations than usual; they had been stored areas that were not climate controlled, causing a variation in the initial temperature of the materials before they were welded and resulting in inferior welds. Once the customer’s team members realized this, they were able to ensure materials were stored in a climate controlled atmosphere to maintain a proper repeatable uniform temperature to ensure repeatable, optimal welds.
Designing an Inspection System
MoviTherm first launched a thermal imaging infrared inspection system about five years ago, Bursell says. This system, which started with one thermal imaging camera connected to a computer, has evolved, but the thermal imaging camera system connected to a computer system is essentially the basis from which each version evolved.
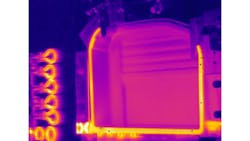
Unlike “traditional“ cameras, which work with visible light spectra, thermal imaging cameras detect infrared radiation (heat) by capturing different levels of infrared light, which is invisible to the naked eye but can be felt as heat, depending on the level and intensity. All objects emit some type and level of infrared radiation. However, a thermal imaging camera does not measure temperature, rather, it calculates temperature by analyzing the heat signature. For example, using a thermal imaging camera, a fire department can find and neutralize such potentially dangerous situations as overheating electrical wires behind thick, opaque walls, because not only can the camera see the heat signature of the surface of the wall itself, it can see and differentiate the more intense heat signature of the overheated wires hidden to human eyes or visible light cameras, behind the wall.
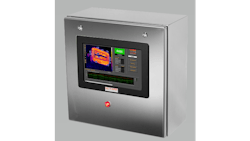
The same technology—and anology—applies to the inspection system, MoviTherm TSI for Plastic Joining and Welding, Bursell says. The turnkey in-line solution, which MoviTherm has developed in partnership with HA Industries (Sterling Heights, MI, USA), provides measurements to ensure proper temperatures are maintained across the entire surface of the weld.
Currently, the inspection systems generally contain at least four cameras, an industrial computer and touchscreen. The cameras are MoviTherm’s A700 Smart Sensor FLIR cameras, which have 640 x 480 thermal pixel resolution, measurement accuracy rated at ± 2°C, precision motorized focus, and are PoE and GenICam compliant.How the Inspection System Works
The inspection system can be configured according to customer requirements, but the goal is essentially the same: to perform the inspection as soon as possible after the weld is completed —within a second —before the weld line bleeds or cools.
“It’s about time, line of sight, and distance,“ Bursell says.“You want as many pixels on the object as possible. You have to have a clear path to whatever object the camera is scanning. You want to capture your images as close to the completion of the weld as possible, and you want the camera to be at as close a distance as is feasible.“
When the weld is completed, the thermal imaging cameras scan the welded object and relay the images to the computer, which is capturing the 15 bit data stream from the cameras. Software, written and developed by MoviTherm, is used to analyze the data.
The quality parameters depend on what is being welded. The computer, utilizing the software, will determine whether the weld meets those parameters. If it does not, the system can be set up to alert the operator on-site. The system can also be set up to connect to the cloud to send alerts to individuals offsite via email, text or voice message.The system can even be programmed to shut down the welding process, if need be, to prevent further production of sub-quality welds until the issue is rectified.
The measurement results are stored within the inspection system itself, and the system has a FTP transfer capability to offload the inspection results to a network or server, Bursell said.
The system performs all these functions in realtime, Bursell says.
What is Next
Currently, the inspection system examines the weld itself, however, one possible next step in the inspection system’s evolution could be to add dual functionality, such as capability to monitor power in the emitters in real time to help detect a failing emitter earlier and automatically adjust power to augment the heat production in that area of the platen. While the customer is lilkely already monitoring power levels, and the loss of power can be extrapolated from inspection findings, such as detection of a proliferation of cold spots or poor welds, the ability to automate all those functions would be an improvement, and one that is certainly possible.
“If you have any kind of variation in an emitter—one goes out, for example, reaching end of life—that can create a cold spot in the weld, which leads to a quality issue,“ Bursell says. “So, if they can catch a bad weld earlier, they can save a company thousands (of dollars). We’re not there yet, but it could be done.“
About the Author
Jim Tatum
Senior Editor
VSD Senior Editor Jim Tatum has more than 25 years experience in print and digital journalism, covering business/industry/economic development issues, regional and local government/regulatory issues, and more. In 2019, he transitioned from newspapers to business media full time, joining VSD in 2023.


