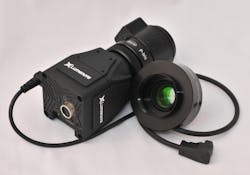
Why You Should be Using a P-Iris Lens in Your Vision System
Controlling the brightness of a scene under varying lighting conditions is no easy task, especially if there are strict parameters surrounding shutter speed and gain that need to be followed. Having the flexibility of a software-controlled DC-Iris can help with this challenge. This blog explores the parameters that mitigate scene brightness as well as their impacts to the overall image.
Gain vs. Shutter Speed
Cameras typically have two software-enabled methods for controlling the brightness of an image: gain and shutter speed. Gain provides an analog multiplier to the value reported by each pixel before it is digitized. It helps to boost weak signals in low light but since it indiscriminately multiplies the signal and the noise alike, images with high gain will be noisy.
The other way of obtaining a brighter image is to expose the pixels to light for a longer period of time by changing the shutter speed. In low light situations, slower shutter speeds help collect enough light and register a signal. For static scenes, this isn’t an issue, but if either the camera or the subject is moving, long exposure times will lead to image blurring.
Transmitted Light vs. Depth of Field
Shutter speed and gain are not the only ways to brighten a scene. Most lenses have variable apertures which behave similarly to the iris of the human eye. A physical barrier inside the lens opens and closes to modify the amount of light transmitted through the lens to the image sensor.
Opening the aperture allows more light to reach the sensor; however it reduces the camera’s depth of field – the range of distance in front of the camera where the subject remains in focus. Closing the aperture inversely reduces the amount of light that reaches the sensor and increases the depth of field.
The following animation illustrates the change in depth of field caused by varying the iris of the lens. The auto exposure function of the camera is used to maintain consistency in the image brightness. Click on the image to view a larger version.
Diffraction vs. Spherical Aberration with IRIS Control
The lens’ aperture not only controls the amount of light reaching the sensor and the depth of field within which it can resolve objects clearly, it also impacts the aberrations found in the image. At small apertures, when trying to maximize the depth of field, the system is subject to diffraction. A loss of resolution in the form of general blurring of the image occurs as light rays are bent around the edges of the aperture.
When maximizing the amount of light reaching the image sensor by using a large aperture, spherical aberration occurs. This is caused by a number of light rays with varying focal points being transmitted through the lens. Spherical aberration also presents as general blurring of the image.
While a better lens design will minimize both diffraction and spherical aberration, they should be taken into account when working with very large or very small apertures.
As the previous infographic shows, a compromise between depth of field and quantity of light exists. Mid-range aperture values such as f/5.6 and f/8 provide a good amount of depth of field without removing too much light. Additionally, mid-range aperture values help reduce both diffraction and spherical aberrations. Click on the image below to view the animation.
DC Iris vs. P-Iris
Given that aperture impacts aberrations, depth of field, and light levels, it is highly beneficial to be able to control it through software as it provides a 3rd degree of freedom in establishing proper scene brightness.
Traditionally, if a software-configurable iris lens was required for a specific application, the only available option was a lens with DC-Iris. This technology, however, has its limitations. With these lenses, selecting a precise iris value is not repeatedly attainable. It was designed to simply make things brighter or darker. Furthermore, the iris often strays from its selected aperture value over time. DC-Iris lenses have mainly been used to adjust the level of light that would reach the sensor and are only reliable when the iris is fully opened or set to its smallest aperture. Consequently, attaining accurate mid-range values has been a challenge for this lens technology.
Precision Iris, known as P-Iris, technology has entered the machine vision market and offers an alternative to DC-Iris lenses. The P-Iris lens has the ability to reliably maintain and return to a specific aperture value while retaining to the ability to vary the aperture in challenging conditions where gain and shutter speed are at their predetermined limits.
Unlike with a DC Iris motor, the stepper motor that is used in P-Iris lenses makes it possible to set and maintain a precise iris opening, allowing the lens to be set to an aperture that optimizes the depth of field and minimizes diffraction, for extended periods of time. Typically, the stepper motors have roughly 72-74 positions, allowing for an extremely fine granularity when setting the aperture value. This allows for optimization to occur with mid-range aperture values, helping to balance shutter speed, gain, and aperture in ideal lighting conditions. In other words, the user can set the aperture to the exact point where the depth of field is greatest and where diffraction has no impact on the sensor based on its pixel size, thus rendering a sharp and blur-free image.
Lumenera LtX45R Camera Series
Every Lumenera camera with a Sony Pregius sensor, known as the Lumenera LtX45R camera series, is equipped with a controller to accept P-Iris lenses. They are currently the only Pregius-based USB 3.1 Gen 1 cameras on the market to interface with P-Iris lenses. To find out which Lumenera LtX45R camera best suits your application, please contact us.
Learn More
To learn more, sign up for our newsletter to automatically receive regular updates from Lumenera.
