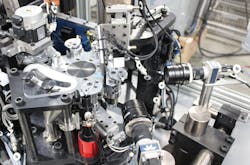
Machine vision system provides 100% in-line inspection of valve body assemblies
When a manufacturer of valve assemblies designed to regulate the flow of gasoline into a carburetor wanted to improve its production process, they turned to engineers at Matrix Design (Elgin, IL, USA; www.matrixdesignllc.com) to develop an automated assembly and inspection solution.
Comprised of two parts, the assembly includes a valve body and a specialized rubber tip designed to withstand fuel contact. Formerly, the manufacturer used a manual gauge to take measurements on random production samples. Manual inspection was especially challenging due to the size of each assembly, which just over one-half inch long.
Figure 1: The main dial rotates so that each completed valve assembly is moved in view of two Teledyne DALSA Genie Nano cameras, which capture images from two sides so that each assembly can be analyzed for height, alignment, concentricity, and runout.
“Our goal was to design a comprehensive solution that seamlessly combines assembly with inspection,” explains Pascal Agneray, the Matrix Design mechanical engineer who conceptualized the solution.
During operation, valve bodies move along a gravity track to a small, servo-driven dial, which feeds them onto a larger, eight-station main dial. On this dial, each valve body is held in place by a set of cam-operated jaws. The rubber tips move in a similar manner to a second servo-driven, singulating mechanism that grabs each tip then pushes and rotates it onto the top of the valve body.
The main dial operates in a fast indexing motion via a reducer/servo set-up, so once each valve body and rubber tip is assembled, it moves in view of two cameras, which capture images of the assembly to be analyzed for height, alignment, concentricity, and runout.
“The entire cycle takes just 1.5 seconds,” says Agneray, “with tens of thousands of parts assembled and inspected each day.”
The system uses two Genie Nano M4020 cameras from Teledyne DALSA (Waterloo, ON, Canada; www.teledynedalsa.com). Featuring 4112 x 3008 resolution 20 fps image capture rates, the cameras are positioned at right angles to acuire images of the valve assembly from two sides. Providing illumination for the inspection are two backlights, also arranged at right angles, from CCS America (Burlington, MA, USA; www.ccsamerica.com).
Cameras and lights trigger as each assembly crosses the field of view. Embedded iNspect Express software assesses each image to ensure that all measurements meet critical dimensions and tolerances within 0.08 mm, while analyzing each image for irregularities in the assembly itself, such as deformities in the valve or rubber tip, which may have occurred in earlier phases of production.
Statistical inspection data is sent through an interface to the PLC. After the main dial rotates past the cameras, assembled parts that pass inspection are sent down a chute to a waiting container. Any parts that did not meet the stringent customer standards are ejected and discarded.
Figure 2: Embedded Teledyne DALSA iNspect Express software assesses each image to ensure that all measurements meet critical dimension standards and are within a tolerance of .08 mm. Any valve assemblies that don’t meet customer standards are ejected and discarded.
“The Genie Nano camera provided the frame rates and resolution needed for this application,” Agneray continues. “We required superior image quality to ensure the greatest possible accuracy, and the camera delivered 9 megapixels resolution.”
The embedded iNspect Express software ensured that each image was evaluated quickly. The software also played a key role in Matrix Design’s choice of the Teledyne DALSA offering.
“The complete solution has been deployed at the customer site for several months, and our customer has been very satisfied with assembly and inspection quality,” Agneray concludes. “In fact, the customer is now considering enhancing the current design with an additional camera system to inspect each valve assembly from above using a specialized lens. Their goal is to identify possible flaws in the rubber tip that are difficult to detect in images captured from the sides.” A video of the insepction station in action can be viewed at http://bit.ly/VSD-AAI.
About the Author

John Lewis
John Lewis is a former editor in chief at Vision Systems Design. He has technical, industry, and journalistic qualifications, with more than 13 years of progressive content development experience working at Cognex Corporation. Prior to Cognex, where his articles on machine vision were published in dozens of trade journals, Lewis was a technical editor for Design News, the world's leading engineering magazine, covering automation, machine vision, and other engineering topics since 1996. He currently is an account executive at Tech B2B Marketing (Jacksonville, FL, USA).
B.Sc., University of Massachusetts, Lowell


