Machine-vision system finds steel web defects
Andrew Wilson, Editor, [email protected]
Corus Colors (Shotton, Deeside, UK; www.corusgroup.com) supplies more than a million tons a year of metallic- and organic-paint-coated steel to automotive, construction, domestic appliance, and general engineering markets in the UK and Europe. It offers about 300 colors and four emboss types, each with a range of reflectance characteristics. Typical defects found on the coated steel include furnace debris, mispainted areas, oven scrapes, blisters, and water stains.
Around 15 to 20 defect types are manually identified by human inspectors as the steel strip passes a special inspection point under controlled lighting conditions. "But," says Alan Morris, technical manager at Corus Colors, "no human operator can concentrate efficiently for more than a few minutes, so all defects are not noticed immediately." With products passing through the web at 1.5 m/s, the potential for waste is high.
null
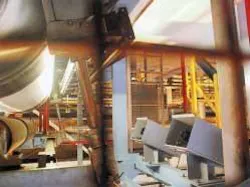
Consequently, Corus decided to automate the process to provide nonstop inspection across 100% of the steel strip. It implemented a machine-vision system based around the SmartView sensor from Cognex UK Ltd. (Epsom, Surrey, UK; www.cognex.co.uk), a linescan-camera-based system developed for inspecting fast-moving webs (see photo). The system installed at Corus comprises four linescan cameras, mounted in two pairs and installed in rugged housings above and below the steel strip downstream in the production line. Two high-power lamps, floor mounted on either side of the production line, direct collimated unidirectional light onto the steel strip using multifiber cables laid out across the full width of the strip. The light sources are interlaced across the width of the strip so that, in the event of a lamp failure, illumination does not fall below the threshold limit, allowing production to continue while the light is replaced.
Each camera has a resolution of 4096 × 1 pixels and handles half the width of the 1600-mm steel strip. Operating at 40 Mbytes/s, the cameras can resolve surface details to within 0.2 mm. After images are digitized by the SmartView sensor system, a thresholding algorithm enables the system to determine whether a newly determined surface anomaly is a defect. If it is, other features such as width, length, density, and grayscale range are measured. This feature characterization is then stored along with an image of the defect and its surrounding material.
Defects are classified by the system administrator based on previous knowledge and experience. "Because the rate at which this inspection is accomplished depends on the natural occurrences of defects, it will take some time before all the defects can be properly classified," says Morris. "We are perhaps 70% of the way to understanding all defects, though there is still more work to be accomplished," he admits. At the Corus Shotton facility, the Cognex system is located upstream of the inspection station, which enables the system operator to be alerted as early as possible about any material defect. Although the initial deployment is a pilot installation, Morris expects similar systems to be installed elsewhere by Corus in the future.

