Noncontact measurements qualify precision parts
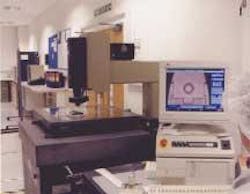
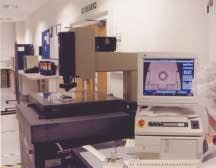
A medical diagnostics company, Unipath (Bedford, Bedfordshire, UK; www.unipath.com), manufactures more than 20 million ClearBlue home pregnancy testing kits a year. To manage this high volume, the company uses three custom automatic assembly and packaging machines that produce up to 100 devices per minute. As production consistency is critical, Unipath called on OGP Ltd. (Hatton, Derbyshire, UK; www.ogpuk.co.uk) to install an OGP Smartscope, a noncontact, video-based measurement system built by Optical Gauging Products (Rochester, NY, USA; www.ogpnet.com).
Originally, Anne Colgrove, Unipath's technical quality manager, investigated tactile probing through 3-D coordinate-measuring-machine (CMM) technology to verify plastic injection moldings and a laminated band of nitrocellulose bonded onto glass fiber tape. However, conventional CMM technology would not account for any variation in visual appearance, was slow to provide support for the throughput capability of the assembly machines, and was detrimental to the fragility of some of the components. These shortcomings led to the installation of the OGP SmartScope ZIP 600.
Unipath's ClearBlue device is as large as a thick ballpoint pen with a push-on plastic cap. The main casing is made up of two parts, each of which is injection molded in the shape of a fan made up of 10 components. Each molding contains various location and fixing pegs and slots, which retain an internal laminate band and an absorbent wick.
While tolerances are not tight, typically ±0.1 mm, the smooth exterior profile results from a rounded elliptical shape that is easy to hold. Any mismatch between the two halves would produce a serious visual defect. In addition, errors in the geometric relationships of each part degrade the efficiency of the automatic assembly process.
Michael Hoskins, a Unipath quality-control analyst, says, "For volume-based automatic assembly, it is imperative that the moldings are consistent. However variations can be present because the moldings are made from several dies. This is also true of the laminated band of nitrocellulose. Each band is flexible and sliced into 39 separate strips from which one strip is fitted into each body during the assembly process," he adds.
To help position the strip, a series of feeder holes is prepunched to a ±0.05-mm tolerance for location purposes in the plastic body and also is used as a guide for the assembly process. The strip is fragile and any contact with the nitro-cellulose surface would destroy the coating. "This fact eliminates the use of a contact-based positioning system and mandates the use of a system such as the SmartScope," says Colgrove.
Unipath has devised a series of fixtures with datum holes for inspecting the different parts. This is important as the assembly process progressively picks each half in turn from the center hub of the molding. Using the SmartScope, the company can check all the features of about 200 molded components in less than eight hours, if required, and can compile trend graphs in less than two hours. Using the system's programmable axes, parts of up to 500 × 660 × 300 mm can be measured and shown at between 32 to 320 times magnifications to a resolution of 0.1 µm.

