Costs are key to microscopy systems
By Joe Hallett,Contributing Editor
Traditional optical microscopes are still the primary inspection tools for examining small parts and materials in the machine-vision and image-processing industry, research centers, and professional testing laboratories, among others. Microscopic inspection techniques can provide valuable information related to product quality, problem solving, and liability. To meet increasing reliability demands over time, microscope functions have been steadily enhanced in speed, accuracy, and flexibility by automatic digital positioning systems, image-analysis software, graphical user interfaces, and high-speed, low-cost computers.
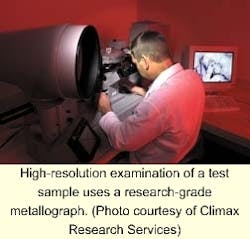
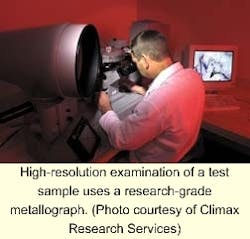
High-resolution examination of a test sample uses a research-grade metallograph. (Photo courtesy of Climax Research Services)
Field studies indicate that users tend to prefer a single source for a microscope. But the additional pieces of equipment and software that make up a complete microscopy system might come from a variety of sources. Some users may not have the time or in-house expertise to assemble their own systems; they prefer to go to a dealer, reseller, or systems integrator who can deliver a turnkey digital microscopy system. Still other users opt to bootstrap their way to a less-expensive system by carefully shopping for hardware and software or by retrieving unused equipment from other company programs, projects, or departments.
In microscopy, software is the key component after the camera and computer. It generally controls the acquisition of images, performs image analysis, and oversees analysis reports, databases, and communication processes. Analyzed images and related data can also be filed and retrieved automatically.
Systems integration
Assembly of microscopy systems often depends upon the system-integration skills of value-added resellers (VARs). Some VARs, such as Mager Scientific Inc. (Dexter, MI), sell microscopes and accessories plus analysis software, image-capture boards, and industrial cameras. Others, such as Clemex Technologies Inc. (Longueuil, QC, Canada), emphasize image analysis by integrating software with supporting hardware from various companies. In either case, end users receive a turnkey microscopy system, based on their requirements.
Rob Pattern, digital sales specialist at Mager Scientific, says, "We distribute Nikon microscopes and integrate nine out of every ten orders for automotive inspection systems with a camera and software. Many systems go to research, quality control, or production laboratories, including automotive manufacturers and their suppliers for material research."
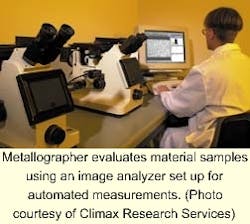
Metallographer evaluates material samples using an image analyzer set up for automated measurements. (Photo courtesy of Climax Research Services)
Documentation is a major activity for these firms. Fast communication of test results between users and suppliers is crucial. Because many automotive manufacturers are far from their suppliers, some suppliers have established technical-support facilities near major automotive technical centers. Parts are analyzed locally and then inspection images are sent by e-mail back to suppliers for a specific action. "That's probably the biggest use of image capture," says Patten.
Some automotive manufacturers use in-house metallurgists who randomly take pieces from assembly lines for analysis. They cross-section, cut, and polish the pieces, and use microscopes with 500X to 1000X magnification to look at grain, porosity, and metal structure. Other inspections include measuring the depth and width of cracks and verifying heat treatments.
"Some automotive tests are qualitative," says Patten, "and some are measurements for which we use software from Media Cybernetics (Silver Spring, MD). Previously, images had to be compared to charts or examined by an eyepiece reticule. Now these tests can be done automatically and faster with digital cameras and computers for greater productivity," he adds.
Microscope-based systems are feeling the impact of lower costs and advances in computer architecture. Use is being enhanced by graphical user interfaces and menu-driven setup screens that allow operators to establish complex test plans without needing a high level of computer skills.
"Now, users start with getting the best possible microscope," says Patten, "and they are replacing their analog video cameras and frame grabbers with high-resolution digital cameras. Images are saved in standard formats such as TIFF. However, image compression isn't used because there is concern over altered images."
Test services
Climax Research Services Inc. (CRS; Wixom, MI) contracts testing services to the automotive industry. "We use Nikon microscopes with the ability to take pictures to get metallographs," says Rodney Bentz Jr., supervisor of the CRS Metallography Laboratory. "Our analyzers are separate instruments from the microscopes, since we can't tie up a piece of equipment for a lengthy period."
Bentz adds, "For image analysis you want a large number of fields of different areas on a test sample. We try to look at 25 sq mm and step to contiguous or scattered areas of the sample. Automation is important because some jobs require more than one routine, for example, one to quantify structure and another to determine content. A typical job might involve 80 samples with taking 25 to 50 fields per sample in as short as 30 s. Some manual operations can take a half-day.
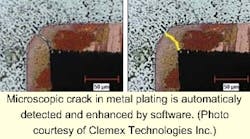
Analysis software is set up by menu selections to reveal microscopic details of a test sample. (Photo courtesy of Clemex Technologies Inc.)
"Typically, a supplier provides a complete microscopy system, but we can add on if some equipment already exists in our laboratory. The bulk of the image-analysis equipment is used for a variety of jobs because the software is flexible. For example, CRS uses analysis tools from Clemex Technologies. You can pick tools from a menu to do most imaging tasks. Our image-analysis systems run under Windows 95 and NT. The digital camera offers better resolution, so surface artifacts can be clearly seen, and the camera can be used for manual testing," comments Bentz.
When necessary, CRS can capture digital images with a research-grade metallograph and Windows PC-based Pax-it software from MIS Inc. (Franklin Park, IL). Systems integrator W. Nuhsbaum Inc. (McHenry, IL) assembled the system, which can do double duty as a metallograph for manual testing.
CRS uses automated stages in which material samples are moved under the microscope to obtain multiple images for analysis and speeding up high-volume jobs. Once a setup has been established for positioning and lighting—a process that might take several hours—test procedures can be initiated in a few minutes.
Some test laboratories are looking for ways to upgrade their capabilities. Says Bentz, "We are looking at digital microscopy with higher-resolution cameras as the cost comes down."
Quality inspection
Clemex Technologies provides software and integrated systems for qualitative microscopy. Quality inspection accounts for 70% of the firm's business, according to company president Clement Forget. The company is currently moving to Universal Serial Bus and FireWire interfaces for controlling microscope functions and peripheral processes. Forget says, "We have twice as many people working on interfaces as on software. Interfaces make the software more costly to develop but easier to maintain. The user usually builds application-specific macros, so we don't need to supply software for different applications. System hardware is being simplified because of increased computer processor speed."
According to Forget, by eliminating the need for special boards, Clemex Technologies hopes to make it possible for customers to use generic high-performance PCs without the need to open up the computer. Rapid changes in technology are having a familiar impact on microscopy. Equipment with a potentially long useful life is being challenged by newer/better/faster products. As usual, the bottom line is cost. But at the same time, new applications are opening up that are only feasible because of newly available computer, camera, and microscope performance. Forget adds, "The trends will be to reduce add-ons to the PC, emphasize software products rather than hardware, and support for a variety of cameras."
Cost is key
Zane Lockhart, staff metallurgist for Vermont American Tool Co. (Louisville, KY), performs metallurgical analyses of tools, saw blades, router bits, and power-tool accessories. His laboratory is stocked with various optical devices. However, cost reduction was his motivation for adding new tools to capture and manage images.
"We work with lots of different samples, but we are a research facility," says Lockhart. "We don't do multiple images. Because we were spending a lot on making hard copies, we bought a PC to our specifications. It provides a 600-MHz processor, a 40-Gbyte hard drive, and a CD read-and-write drive. We use an MIS image-capture board and Pax-it software for simple image analysis, such as moving from black-and-white to color and pixel counting for porosity or grain boundary work. It's not a high-level setup, but it's okay for quick use," he adds.
The imaging system connects through a switch box to an upright Olympus America Inc. (Melville, NY) BH-2 microscope, an Olympus SZ-60 color stereo microscope, and a Sony Electronics Inc. (Park Ridge, NJ) VID-P100 video presentation camera system. Images also can be transferred to the system from a Leica Microsystems Inc. (Bannockburn, MI) S-360 stereoscan electron microscope and Oxford ISIS (University of Oxford; Oxford, England) system software for x-ray energy dispersive spectroscopy.
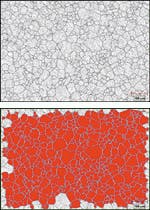
Microscopic examinations of a material sample show the grain structure that can be enhanced by color coding or by graphical representation. (Photo courtesy of Clemex Technologies Inc.)
Lockhart says, "We can go from low-power photographs to up to 1000X photographs. We looked at digital cameras, but the three-chip Hitachi Denshi America Ltd. (Woodbury, NY) HV-C20 color analog video camera seemed to give somewhat better images. We've been using this system since early this year. Now we pull images directly into an electronic report that can be e-mailed, which speeds up distribution. Everyone gets original pictures and color. We can manipulate the images and add alphanumerics, arrows, and icons. And it's saving the cost of film—as much as $10,000 a year."
Fluid analyis
Dennis Menier, a development engineer for TI Group Automotive Systems (Warren, MI), a supplier of automotive fluid-handling systems, performs fluid analyses on a tight budget. A consolidation of some laboratories at his company gave him the opportunity to acquire some image-analysis equipment at low cost.
"When you have to stay in budget, it forces you to shop," says Menier. "We do a lot of thin-film coatings that must be evaluated quickly. We found that we could get maximum analysis performance from a Nikon Electronic Imaging (Melville, NY) high-power microscope that was originally intended for medical use, not metallography. Specimens under test have to go through a surface-grinding process before being mounted in an old metallurgical press. The mounts are put on a slide with high-quality clay underneath, then they are pressed into the clay to get it square."
Menier's image-analysis system is based upon an MIS image-capture board running on a Windows PC with MIS Pax-it software feeding Microsoft Outlook for the e-mail distribution of images. "If I have a lot of photos, I can package the images as bmp, tif, or jpg files, depending on the recipient's preference," says Menier. "I use Zip-it to compress the files. I also use a Sony CCD video camera and a video printer connected by a coaxial cable. The software digitizes the images and puts them on the computer screen."
COMPANY INFORMATIONClemex Technologies Inc.Longueuil, Quebec, Canada J4G 1T5Web: www.clemex.comClimax Research Services Inc.
Wixom, MI 48393
Web: www.climaxresearch.com
Hitachi Denshi America Ltd.
Woodbury, NY 11797
Web: www.hdal.com
Leica Microsystems Inc.
Bannockburn, IL 60015
Web: www.leica-microsystems.com
Mager Scientific Inc
Dexter, MI 48130
Web: www.magersci.com
Media Cybernetics
Silver Spring, MD 20910
Web: www.mediacy.com
MIS
Franklin Park, IL 60131
Web: www.mis.com
Nikon Electronic Imaging
Melville, NY 11747
Web: www.nikon.com
Olympus America Inc.
Melville, NY 11747
Web: www.olympusamerica.com
Sony Electronics Inc.
Park Ridge, NJ 07656
Web: www.sony.com/videocameras
TI Group Automotive Systems
Warren, MI 48090
Web: www.tiautomotive.com
University of Oxford
Oxford, United Kingdom OX1 2JD
Web: www.ox.ac.uk
Vermont American Tool Co.
Louisville, KY 40202
Web: www.vatool.com
W. Nuhsbaum Inc.
McHenry, IL 60050
Web: www.nuhsbaum.com
