Many companies are now producing their own in-house events at which to highlight their latest products, software, and application solutions. In August 2007, for example, National Instruments (NI; Austin, TX, USA; www.ni.com) held its annual NI Week, which the company used for just this purpose (see Vision Systems Design, Oct. 2007, p. 74). In addition, from August 13 to 17, PPT VISION (Eden Prairie, MN, USA; www.pptvision.com) held its Global Partner Conference in St. Paul, MN, USA. At the event, PPT partners from around the world gathered to discuss machine-vision systems developed with the company’s IMPACT range of products.
Of the many system-integration solutions presented during the three days, perhaps the most impressive were those given by Dave Boehm of BW Rogers Co. (Akron, OH, USA; www.bwrogers.com), Greg Gross of Simco Technologies (Norcross, GA, USA; www.simcotech.com), and David Dechow of Aptúra Machine Vision Solutions (Lansing, MI, USA; www.aptura.com). While Boehm described a system for the inspection of caulk containers, Simco’s Gross explained how his company had developed a system to inspect the faceplates of car stereos. Finally, Aptúra’s Dechow showed how a PPT smart camera was being used to inspect the mold cavity printed on the bottom of foam drinking cups.
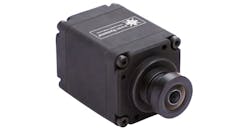
“To inspect empty caulk containers before the caulking product is inserted,” says Boehm, “four potentially major areas must be analyzed. These include the position of the nozzle, presence of foil inside the tube, the shape of the open end of the tube, and the seal between the metal end of the tube and the cardboard side.” Boehm and his colleagues used four IMPACT T20 cameras from PPT to do this.
For inspection of the nozzle end of the container, a 3.5-in. strobe ringlight was used so that the metal around the nozzle appears bright. When the nozzle is missing or improperly positioned, this area will appear dull or dark. By imaging the nozzle directly with a T20 camera, any defects can be clearly seen (see Fig. 1).
Figure 1. IMPACT T20 cameras from PPT inspect nozzle, open end of the container, and edges of an empty tube of caulk before the caulking product is inserted. Two more T20 cameras inspect the side of the tube.
To inspect the open end of the container, a second T20 camera was used. The same trigger that starts the inspection on the camera used for nozzle inspection triggers the inspection for any presence or absence of the foil with the second. “Since the nozzle is translucent, the light positioned at the nozzle end appear as a bright spot to the second camera, unless foil blocks out the light,” explains Boehm. After foil inspection is complete, the second camera is again triggered with a second 3.5-in. ringlight that illuminates the edges of the tube. A circle gauge tool, part of PPT’s IMPACT 7.3 software, then measures the roundness of the tube opening.
Two T20 cameras with 5-in. LED lights inspect the sides of the tube. These are triggered simultaneously before the part is rotated 90°. After the part is rotated, a second trigger is used to capture four images of the tube, one every 90°. In moving 90°, the tube travels approximately 4.5 in. “Using a region of interest placed along the edges of the tube, the system is programmed to inspect for any defects such as cracks, dents, and broken seals,” says Boehm. All of these inspections occur within 0.2 s.
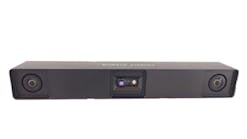
While many systems require multiple smart cameras, others such as those for console faceplate inspection and optical character inspection, can use single-camera solutions. At Simco Technology, for example, a single 1600 × 1200 IMPACT 9200 camera from PPT is currently being used to inspect the faceplate of a car stereo. “As well as inspecting the print quality of various texts on panels, dials, and buttons, the vision system also verifies an ID code located at the top right corner of the faceplate,” says Simco’s Gross. Due to the print sizes relative to the size of the faceplate, the camera must cover an inspection area approximately 10 in. wide (see Fig. 2).
“When the faceplate is loaded into the inspection cell, a barcode reader sends plate model information to the IMPACT 9200 through a serial port. The camera then loads the corresponding part file and performs the inspection. Once complete, data are sent to a custom Visual Basic application through an ActiveX control that links to the manufacturer’s SQL server. To provide even coverage over the curved surface of the faceplate, inspection is performed in an enclosed space box with two diffused bar lights mounted above the part,” says Gross.
At Aptúra, polystyrene cups needed to be sorted based on a mold cavity number printed on the bottom of each cup. When the molding process produces bad products, some of the cups may need to be removed before final packaging.
Figure 3. To sort polystyrene cups based on a mold cavity number printed on the bottom, a PPT IMPACT C30 system locates mold cavity numbers in one of three locations around the circumference of the bottom. At each of the target locations, the system reads up to two different fonts.
To sort each product, the vision system needed to locate a mold cavity number in one of three locations around the circumference of the bottom of the cup (see Fig. 3). “At each of the target locations, the system reads up to two different fonts. If the number matched one of six operator-entered cavity numbers produced by a specific molding machine, the cup was rejected,” says Dechow.
To perform this inspection, Aptúra designed an inspection station based on a single PPT IMPACT C30 vision system. “To adequately illuminate the bottom of the cup to highlight the raised foam letters, a low-angle (darkfield) LED ringlight was used. Due to the cup’s variations in size and height, the camera and lighting assembly also needed to be adjustable to accommodate different product types,” says Dechow.


